Alright, Space Ranger, your brand-new telescope has arrived. Unboxing it feels like the start of a proper mission, just like when Space Ranger Fred first fired up the engines on his ship. But what happens next can sometimes feel a bit… well, intimidating.
Don't worry. This is your official mission briefing, designed to turn that first night of stargazing from potentially frustrating into pure, unadulterated wonder.
Your back garden is now your launchpad to the cosmos. The trick is knowing what you're looking at and managing your expectations. You won’t be seeing those dazzling, colourful nebulae from the James Webb Space Telescope—those images are composites of long-exposure photos. What you will see is something arguably even more magical: the universe, live and in real-time.
Your First Night Under the Stars
So, what cosmic sights can your new telescope realistically reveal? On your very first clear night, you’re in for some incredible views.
Here’s what to hunt for first:
- The Moon: Without a doubt, the best place to start. You'll be absolutely floored by the pin-sharp detail of its craters, towering mountains, and the shadowy plains. Pay close attention to the "terminator"—that's the line where light meets dark—as this is where shadows are longest and the details really pop.
- Bright Planets: Keep an eye out for Jupiter. It often looks like a very bright star, and with a steady view, you’ll be able to spot its four largest moons—tiny pinpricks of light huddled close by. And then there's Saturn. Catching a glimpse of its rings for the first time is a moment no stargazer ever forgets. Truly unforgettable.
- The Stars: A common mistake is thinking a telescope will make stars look like giant, fiery balls. They are so incredibly far away that even through your scope, they'll remain brilliant, sharp points of light. This isn't a let-down; it's a profound lesson in the sheer scale of the universe!
The key to a brilliant first night out is all about expectations. You're not trying to replicate NASA's greatest hits. You're here for the personal thrill of seeing these celestial wonders with your own two eyes. This is the start of your cosmic adventure.
Preparing for a Successful Launch
Your journey to the stars actually begins long before you point your telescope skyward. The most important step is simply picking a clear, dark night, as far away from the glow of streetlights as you can manage.
Think of it as your own Space Ranger Fred and the Shoelace Adventure—a small but essential step that sets the entire mission up for success.
Thankfully, getting to grips with a telescope is easier than it's ever been. Modern tech has completely opened up amateur astronomy here in the UK. Features that once seemed like science fiction, like automatic 'GoTo' mounts and smartphone integration, now make it incredibly simple for families to get started.
To help you get your bearings, here’s a quick rundown of the main telescope types.
Choosing Your First Telescope: A Quick Comparison
This little table breaks down the three main types of telescopes you'll come across. It’s perfect whether you’re still choosing your first scope or just want to understand the new bit of kit you’ve got sitting in the living room.
| Telescope Type | Best For Viewing | Ease of Use for Beginners | Typical Price Range |
|---|---|---|---|
| Refractor | The Moon, planets, and bright deep-sky objects | Very easy. Low maintenance and intuitive to use. | £70 – £500+ |
| Reflector | Faint deep-sky objects like nebulae and galaxies | Requires some alignment (collimation). Great value. | £150 – £600+ |
| Catadioptric | All-around viewing—planets and deep-sky objects | Fairly easy, but more complex. Compact and powerful. | £300 – £1,500+ |
Each type has its own strengths, but for a first-timer, you really can't go wrong with a good refractor or a simple reflector. They offer a fantastic doorway to the cosmos.
Remember, your first night under the stars is just the beginning. Welcome to the club, stargazer.
Assembling Your Telescope Step by Step
Right, let's get that magnificent machine out of its box and ready for a cosmic adventure. Assembling a new telescope can feel like one of Space Ranger Fred’s more complicated missions, but trust me, it’s much simpler than it looks. Forget those confusing diagrams for a moment—we just need to get friendly with the three main bits.
First, you have the optical tube. That's the long, main body of the telescope that does all the heavy lifting of gathering light. Then there’s the mount, which is just a fancy name for the tripod that holds everything steady. And finally, you’ve got the eyepieces, your personal windows to the universe.
Putting It All Together
Your first mission is to get that mount set up. Find a nice, level bit of ground—a solid patio is a far better launchpad than a soft, wobbly lawn. Extend the tripod legs and make sure all the clamps are locked down tight. A stable base is the secret to getting crisp, clear views of the cosmos.
Once your mount is steady, it’s time to attach the optical tube. Most beginner scopes make this easy with a simple clamp or a dovetail bar that slots neatly into the top of the mount. You'll tighten a couple of large knobs to secure it. Give it a gentle wiggle to make sure it’s snug before you let go!
Understanding Your Mount
Your telescope probably came with one of two main types of mount. Knowing which one you have will make pointing it at the stars a whole lot easier.
- Alt-Azimuth (Alt-Az): This is the most common and straightforward type for beginners. It moves up and down (that's the altitude) and left and right (the azimuth), just like a camera tripod. It’s incredibly intuitive.
- Equatorial (EQ): This one looks a bit more complex, with dials and a tilted axis. It’s cleverly designed to follow the natural arc of the stars, which is brilliant for tracking an object for a long time without having to keep adjusting.
For your first few stargazing nights, an Alt-Az mount is perfect for just pointing and exploring.
This simple workflow shows the key stages for a successful stargazing session, from planning to observing.
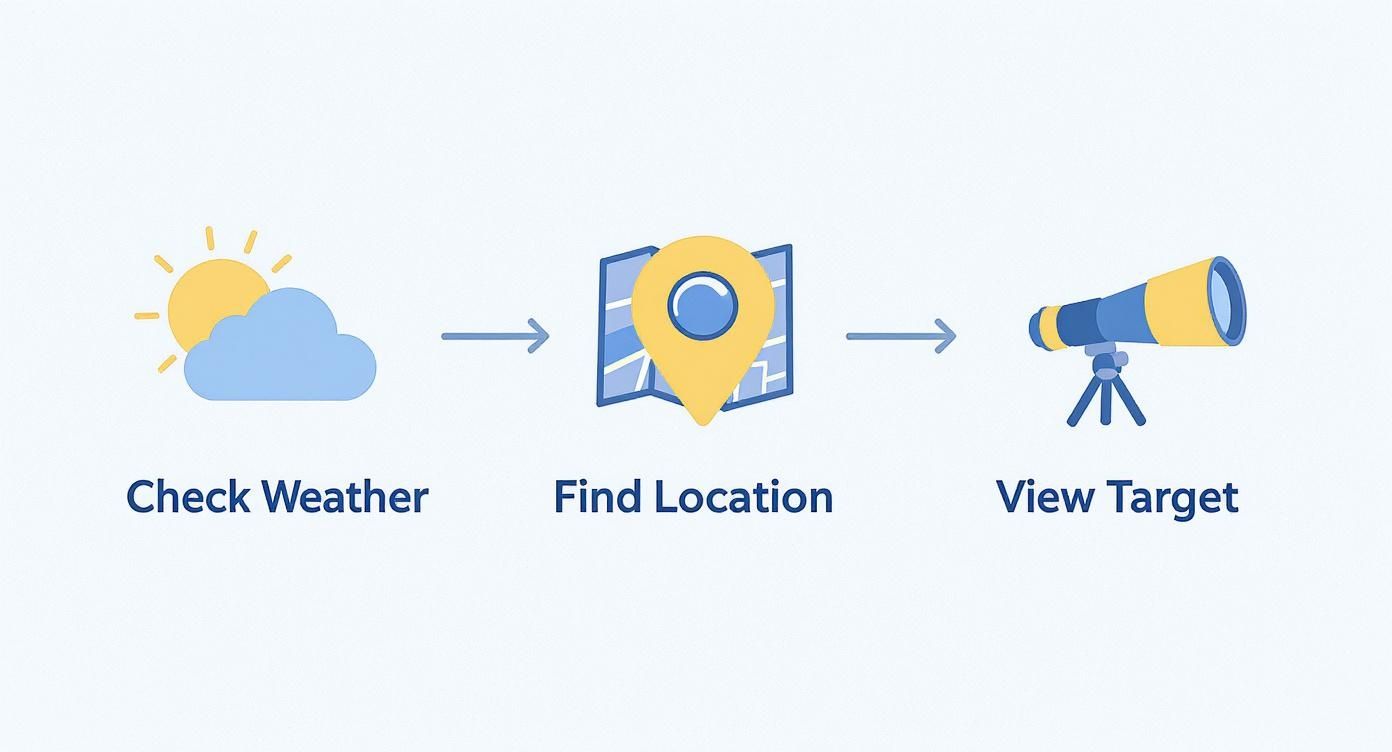
This process highlights that what you do before you even touch the telescope is just as important as the setup itself.
The Magic of Eyepieces
The final step is to slide an eyepiece into the focuser, which is the bit at the end of the optical tube you look through. You probably have a few of them, each with a number like "25mm" or "10mm" printed on the side.
Here's a top tip that trips up nearly every new astronomer: the bigger the number on the eyepiece, the lower the magnification. You should always start with your highest number eyepiece (like the 25mm one), as it gives you a much wider view of the sky, making it easier to find what you're looking for.
Once you’ve found your target, you can swap it out for a lower number eyepiece (like the 10mm) to zoom in for a closer look. In a way, it’s a bit like the plot of Space Ranger Fred and the Tick Tock Tale—patience and starting with the bigger picture is the key to a successful outcome.
With all the pieces connected, your telescope is now fully assembled and ready for its first mission to the stars.
Getting Your Finderscope Pointing True
Before you even think about hunting for galaxies, there's one small but crucial job to do: aligning the finderscope. Get this right, and you'll spend your evening marvelling at cosmic wonders, not fumbling around in the dark trying to find them.
The best way to do this is during the day. It’s a simple little routine that makes your night-time viewing a thousand times easier.
First, point your main telescope at something far away that isn't going to move. Think of a distant telegraph pole, a church spire, or even the top of a big, old oak tree. Pop in your lowest-power eyepiece (the one with the biggest number on it) and get that landmark right in the centre of your view.
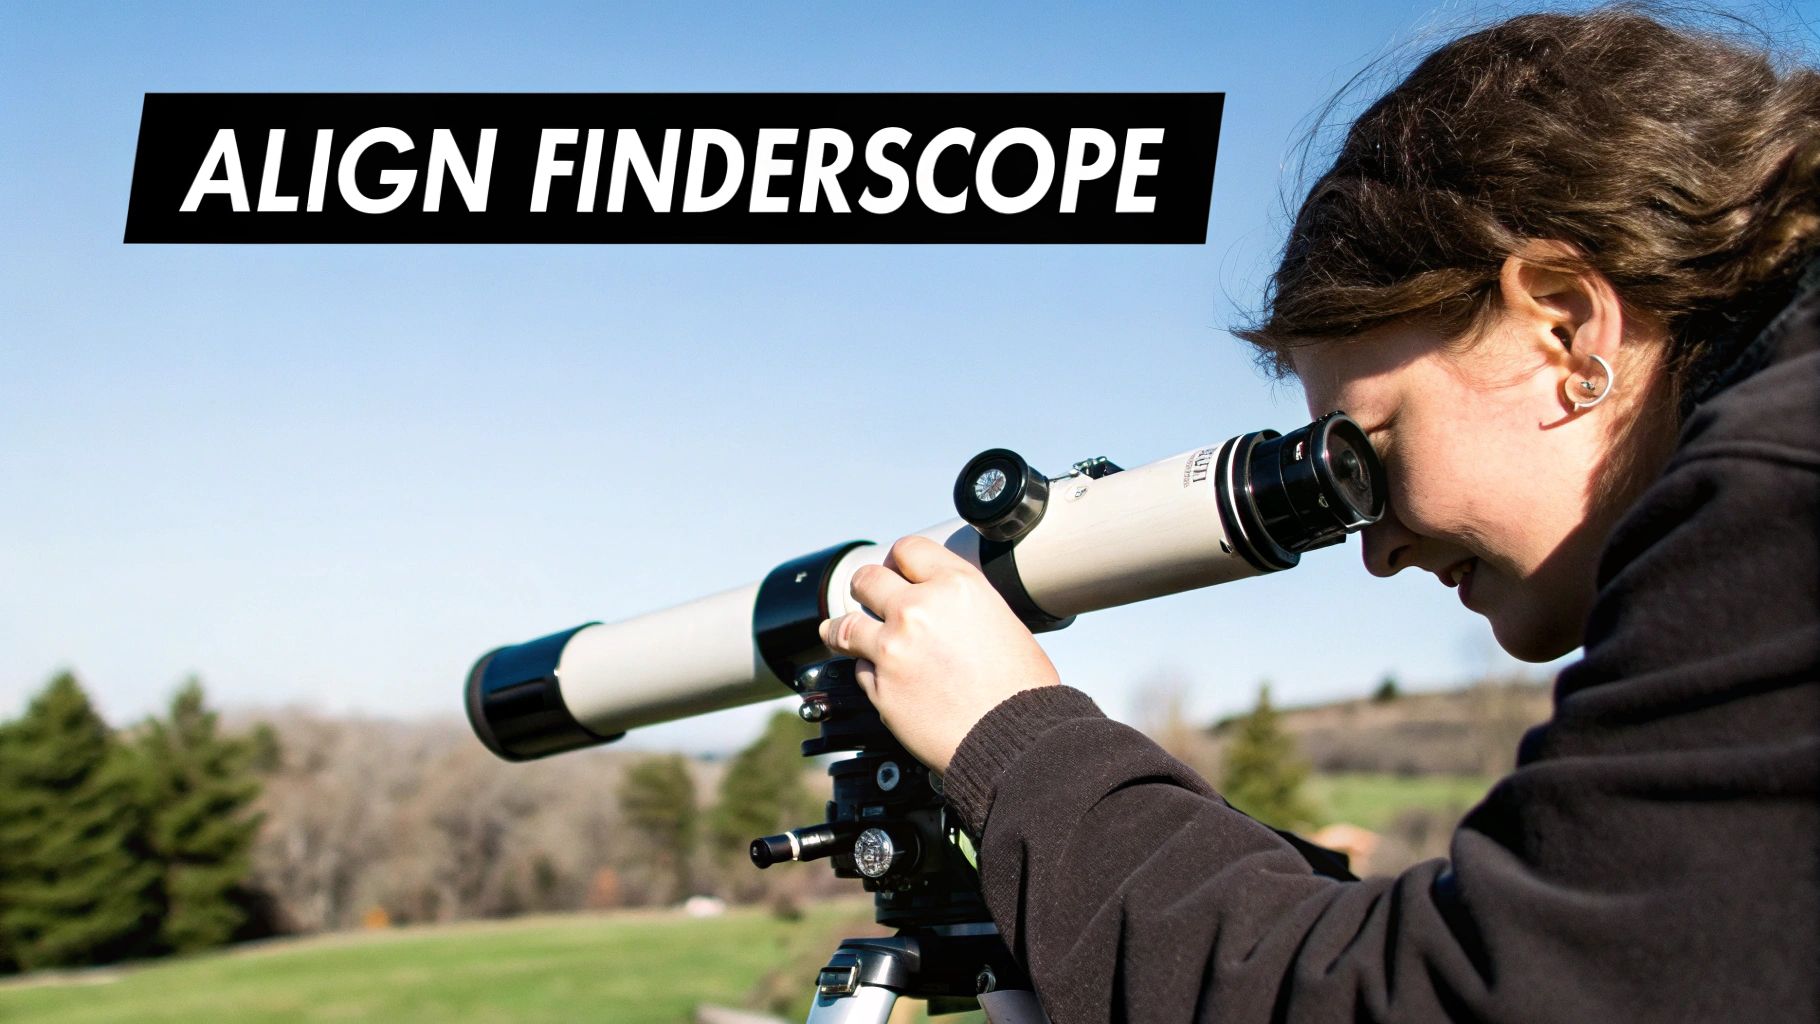
The Daytime Alignment Dance
With your landmark perfectly centred in the main telescope, it’s time to peek through the finderscope. You'll probably see the crosshairs are way off target. That's perfectly normal.
Your mission, should you choose to accept it, is to use the little adjustment screws on the finderscope's bracket to gently move the crosshairs. Nudge them bit by bit until they are pointing at the exact same spot on that telegraph pole or oak tree.
Once they match up, you've done it! Now, whatever you point the finderscope at will be waiting for you in the main eyepiece.
A few quick tips to make this a doddle:
- Make sure your tripod is on solid ground. No wobbly lawns!
- Lock down all the clamps on the mount before you start fiddling with the screws.
- Take your time. A sip of tea and a steady hand go a long way.
Aligning the finderscope properly is like getting the cheat code for the night sky. It takes a little patience, but the payoff is huge.
A Gentle Touch on the Screws
Your finderscope will have a couple of small screws, usually two or three. The key here is to make tiny adjustments. A quarter-turn is often more than enough.
Turn one screw a little, then look through the finderscope to see what happened. If the crosshairs move away from where you want them, just loosen that screw a touch and tighten the one opposite it. Think of it as gently guiding the scope into place, not forcing it.
And please, don't overtighten them! You don't want to strip the threads or knock the whole thing out of whack. In Space Ranger Fred and the Umbrella Rescue, Fred learns that small, careful tweaks are what save the day—it’s the same story here.
Here are a few common trip-ups to avoid:
- Cranking the screws too hard: This is the fastest way to make the crosshairs drift.
- Using a high-power eyepiece to start: This makes your field of view tiny and hard to work with. Stick with low power.
- Forgetting to check the tripod: A wobbly base means you'll be chasing a moving target.
First Target: The Moon
Now that your finderscope is dialled in, the real fun begins. Tonight, your first port of call should be the Moon.
There’s no better practice target. It’s big, it’s bright, and its craters and seas make focusing an absolute joy.
- Gently twist the focus knob until the details on the lunar surface pop into sharp relief.
- Don't be afraid to stop and just let your eyes adjust for a moment.
- Once you've had a good look, try swapping to a higher-power eyepiece to get a closer view.
The Moon is your best mate when you're starting out. It gives you an instant, satisfying view and builds your confidence for chasing down fainter, trickier objects later on.
For the sharpest possible views of our lunar neighbour, start with your lowest-power eyepiece (like a 25mm), centre the "terminator"—the line between light and shadow—for incredible contrast, and if the image gets fuzzy, just switch back to a lower magnification.
What If It Goes Wrong?
Sometimes, you'll find your alignment has drifted after an hour or two. Don't panic! It’s often just because the temperature has changed, causing the metal parts to expand or contract slightly. A quick check to make sure the adjustment screws are still snug usually does the trick.
Mrs Patel from Manchester found a brilliant daytime target: a pink garden gnome at the bottom of her garden. After getting her finderscope perfectly aligned on it, she found Jupiter with no trouble at all that evening. Her children, aged 7 and 9, were over the moon (pun intended!) to see Jupiter's own moons, and they even started a stargazing log, just like in Space Ranger Fred and the Tick Tock Tale.
By mastering this simple daytime trick, you’ll be set to explore the cosmos with ease. Just remember to give your alignment a quick check each time you set up your telescope.
With a bit of patience and a cuppa, you’ll be finding planets and nebulae like a seasoned pro. Clear skies.
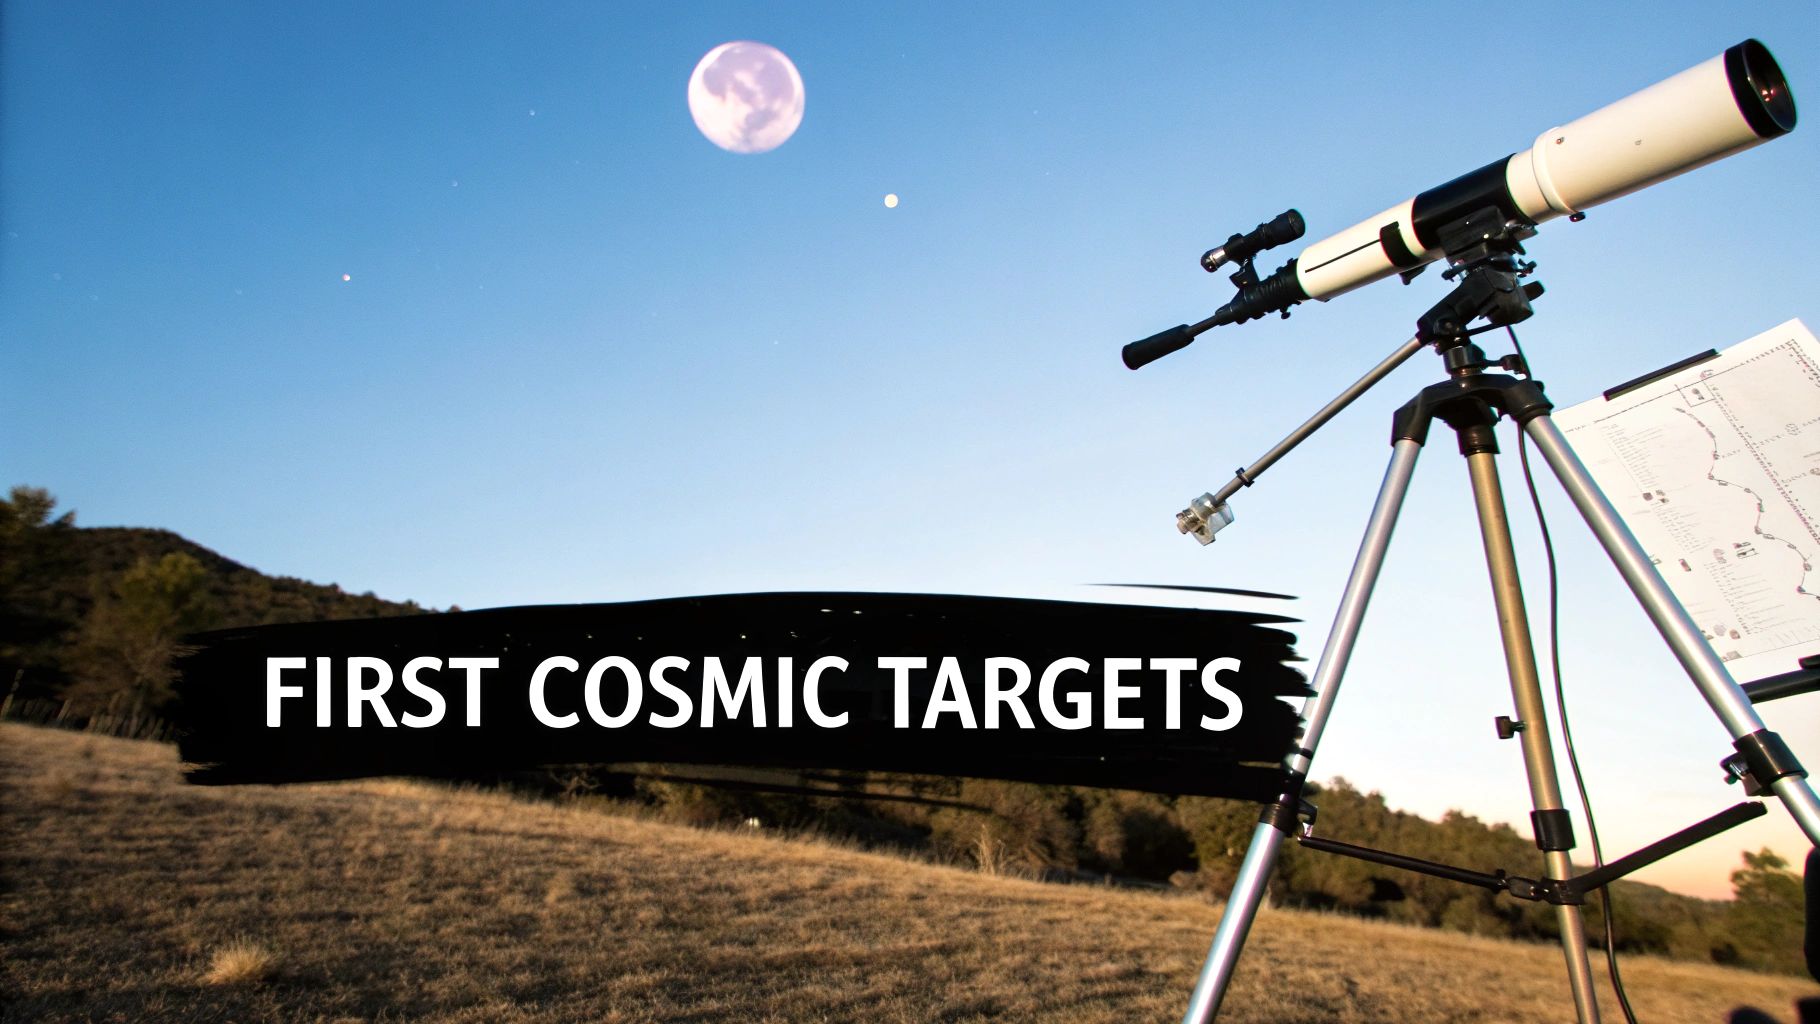
Finding Your First Cosmic Treasures
With your telescope assembled and your finderscope pointing true, the entire cosmos is waiting. So, where do you point it first? Let's treat this as a treasure map to the night sky, starting with the biggest and brightest cosmic jewels perfect for any budding astronomer.
Your first mission, should you choose to accept it, is a close one: our very own Moon. It is, without a doubt, the most spectacular and satisfying object for a beginner. The sheer detail you can see is breathtaking. For the absolute best views, aim your telescope along the terminator—that’s the dramatic line where daylight meets darkness on the Moon's surface. Along this edge, shadows are long and deep, making craters, mountains, and valleys pop out in stunning three-dimensional relief.
Hunting for Planets
Once you’ve explored every nook and cranny of the lunar landscape, it’s time to hunt for other worlds. The planets are always on the move against the backdrop of stars, but a few are surprisingly easy to track down.
- Jupiter: This gas giant often stands out as an exceptionally bright, steady "star" that doesn't twinkle. Through your telescope, you'll see it as a distinct disc. On a clear night, you might even spot its four largest moons—Io, Europa, Ganymede, and Callisto—looking like tiny pinpricks of light lined up perfectly beside it.
- Saturn: Seeing Saturn’s rings for the first time is a core memory for every astronomer. It’s a truly magical sight that, believe me, never gets old. Even a small, basic telescope can reveal the iconic rings, making the planet look just like it does in the books. It’s a real "wow" moment.
It seems more and more families are discovering this magic. After a couple of years of decline, the UK's optical telescope market grew by 7% in 2024 to about $17 million. It’s brilliant to see so many people getting hooked on this hobby.
Peeking into Deep Space
Ready to look beyond our solar system? Out there lies a vast expanse filled with ‘deep-sky objects’. While many are faint and challenging, some are perfectly suited for beginners. The Orion Nebula (M42) is a must-see. It's a stellar nursery where new stars are being born, and it’s one of the brightest and most beautiful nebulae out there. You’ll find it in the ‘sword’ of the constellation Orion, where it appears as a fuzzy, ghostly cloud in your eyepiece.
Exploring a nebula is like looking at the building blocks of the galaxy itself. If you're curious about these incredible cosmic clouds, we have a whole guide explaining what is a nebula.
Don't be discouraged if these distant objects look like faint, grey smudges at first. Your eyes need time to adjust to the dark, and remember, you're seeing light that has travelled for thousands of years to reach you. It's a genuinely amazing experience.
To navigate this cosmic ocean, you’ll need a good map. Luckily, modern technology makes this incredibly easy. There are dozens of fantastic smartphone apps (like Stellarium or SkyView Lite) that use your phone's GPS to create a live map of the sky. Just point your phone up, and they'll show you exactly what you're looking at, helping you identify constellations and locate planets in seconds.
Just remember that, much like Space Ranger Fred learned in Space Ranger Fred and the Tick Tock Tale, patience is the most important tool you have. Give your eyes time to adjust, take your time finding your targets, and soak in the absolute wonder of it all. Happy hunting.
Making Stargazing a Family Adventure
Astronomy is one of those special hobbies that gets even better when you share it. A telescope can easily become the centrepiece of a brilliant family night, creating memories that last a lifetime and might just spark a genuine passion for science.
Turning your stargazing session into a proper family adventure is all about making it fun, accessible, and cosy. You don't need a perfectly dark sky or a massive telescope to capture a child's imagination.
This increased accessibility seems to be a growing trend. Recent market data shows that between January and July 2025, UK imports of optical telescopes shot up by an incredible 72.65% compared to the previous year. This boom was driven by a significant drop in the average price, suggesting more families are getting into the hobby. Discover more insights about the UK's growing interest in astronomy.
Sparking Curiosity in Young Explorers
For younger children, the key is to keep things short, sweet, and exciting. Forget complex constellations for a minute and start with the Moon. Its bright, detailed surface is an instant win.
Let them have the first look, and get them to help you turn the focus knob until the craters pop into sharp view. It’s their discovery.
Another fantastic idea is to start a family 'stargazing logbook'. This doesn't need to be anything fancy—a simple notebook where they can draw what they see through the eyepiece will do. Whether it’s a lumpy sketch of the Moon or four tiny dots next to Jupiter representing its moons, it makes the experience personal and memorable.
The goal isn't a long, detailed science lesson. It's about sharing a moment of wonder. A ten-minute peek at Saturn's rings followed by a hot chocolate is a perfect session.
Weaving Stories into the Stars
To truly bring the night sky to life, wrap your observations in a story. You could talk about the Greek myths behind constellations like Orion the Hunter or Ursa Major, the Great Bear. Pointing out the patterns and sharing their ancient tales makes the stars feel like old friends.
You can also bring in modern adventures. Reading a chapter from a book like Space Ranger Fred and the Umbrella Rescue before heading out adds a whole new layer of excitement. Framing your session as a "mission" just like Fred's can capture their imagination and make looking through the telescope feel like a real space exploration.
For an extra dash of fun, why not try themed nights?
- Mission to Mars: When the red planet is visible, make it a Mars-themed evening. Think red-coloured snacks and drinks!
- Meteor Shower Party: During a meteor shower like the Perseids, set up blankets and sleeping bags in the garden. See who can count the most shooting stars.
Keeping it fun, comfortable, and imaginative is the real secret.
Got Questions? We've Got Answers
Every new Space Ranger has questions buzzing around their head. Getting started with a telescope is a brilliant adventure, but it’s completely normal to wonder about a few things. Let's tackle some of the most common queries we hear to help you get the most out of your stargazing sessions.
Why Can’t I See Colour in Nebulae Like in the Pictures?
This is a fantastic and very common question. Those spectacular, vibrant images you see from giants like the James Webb Space Telescope are created using special filters and incredibly long exposure times—sometimes hours long—to capture light that is far too faint for our eyes to ever detect on their own.
Our eyes simply aren't sensitive enough to pick up the subtle hues of distant objects like galaxies and nebulae. Through your telescope, you'll see them as beautiful, ghostly grey or even greenish clouds. Trust me, seeing these objects with your own eyes, in real-time, is a magical and authentic experience in itself. That’s the real thrill.
What Do the Numbers on My Eyepieces Mean?
The number on an eyepiece, like "25mm" or "10mm," refers to its focal length. It can feel a bit backwards at first, but just remember this simple rule: the larger the number, the lower the magnification and the wider your view of the sky will be.
You should always start your search with your highest number eyepiece (like a 25mm). Once you've found and centred your target, you can swap to a lower number eyepiece (like a 10mm) to zoom in for a more detailed look. This technique makes finding things so much less frustrating.
Think of it like this: your 25mm eyepiece is for finding the cosmic treasure, and your 10mm eyepiece is for inspecting the jewels up close. It's a method that even Space Ranger Fred would approve of on one of his missions.
Why Is My View Through the Telescope So Shaky?
A shaky view is nearly always down to the stability of your tripod. First, make sure you’re set up on solid, level ground—a patio or pavement is great. A soft lawn or a bouncy wooden deck? Not so much.
Check that all the tripod leg clamps are tightened securely. It also helps to avoid extending the legs to their maximum height; a lower centre of gravity makes the entire setup much more stable. Finally, when you're focusing, use a very light touch to avoid introducing vibrations.
Don’t forget that external factors can play a part, too. You can learn more about how phenomena like solar winds affect our atmosphere by checking out our guide on what is space weather.
Ready to inspire the next generation of explorers? The adventures of Space Ranger Fred are designed to spark curiosity and make learning about science and space an exciting journey for children. Discover a universe of fun and education at https://spacerangerfred.com.